Mooz 2 WiFi review
Please read Liability Disclaimer and License Agreement CAREFULLY
I am writing this article because i have won the Contest: Christmas Offer: Best Tools for DOBOT MOOZ and i have accepted the request from DOBOT team to share my first impressions.
First stop - unboxing the product - the video below shows most of the unboxing, most of it because my camera SD Card was full at one point and the recording stooped.
As you can see in the video this box contains lots of goodies:
1. The WiFi - it is based on ESP WiFi chip, this allows the printer to work in AP mode or to be connected to a router.

I believe that antenna is locate too close to the Z axis and also the WiFi chip is close to the stepper motor causing EM interference with the WiFi signal.

Back of the printer base with electronics removed to allow the assembly of the Z axis rails - notice the rectangular print of the thermal pad.
Keep the surface clean and do not touch the pad during assembly in order to ensure a good heat transfer from PCB to base.

One more thing to notice here is that the main board has also an empty space, i guess that this is the footprint for a Bluetooth module.

2. A new feature of the new design is the thermal pad that is placed on the main board on the stepper controllers side. This pad is the thermal link
between the board and the base of the printer that is now also a radiator.
As you can notice the Micro SD card connector is now placed on the board side, the plastic cover has a slot that allows mounting of the SD.
When you will assemble this printer you will have to remove the main board + plastic cover from the base, this is the best time to plug in your SD card,
later it will be a pain to access the card and this is not a design issue as this is a wireless and the SD acts as local storage.
The printer comes with and USB stick (with lots of example files) that can be plugged on the back of the printer.
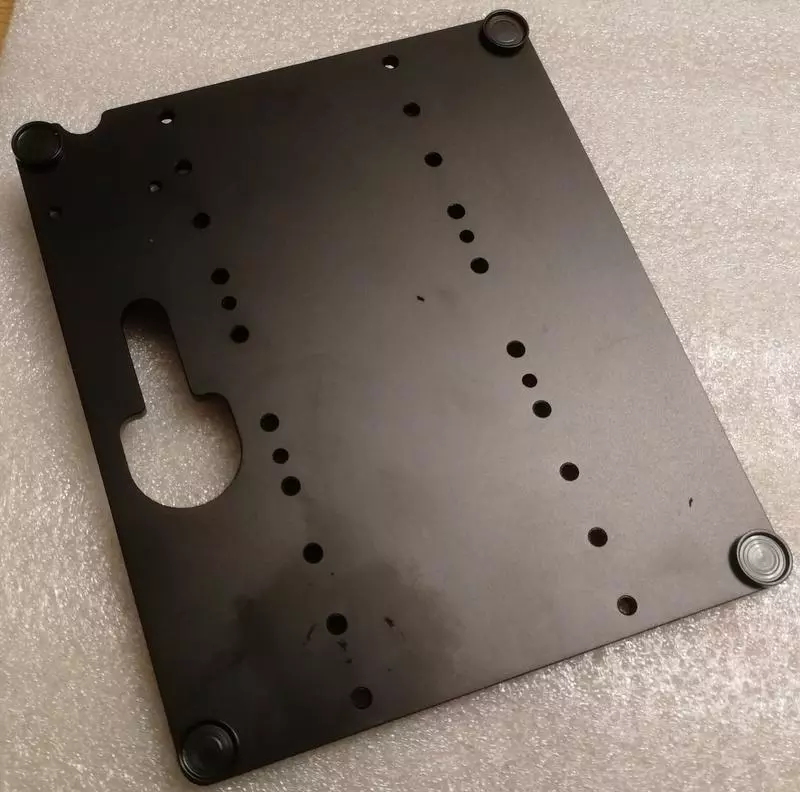
3. New design for heated bed - now the heater is glued on glass that is fixed on the printer table (the CNC table) using 4 magnets

The connection from main board to the table can be permanent while you just connect the heated bed to the table

Heated bed assembled on the table

New CNC/LASER table design - I wonder if i can use the round pads as reference points for CNC/LASER 0 point.
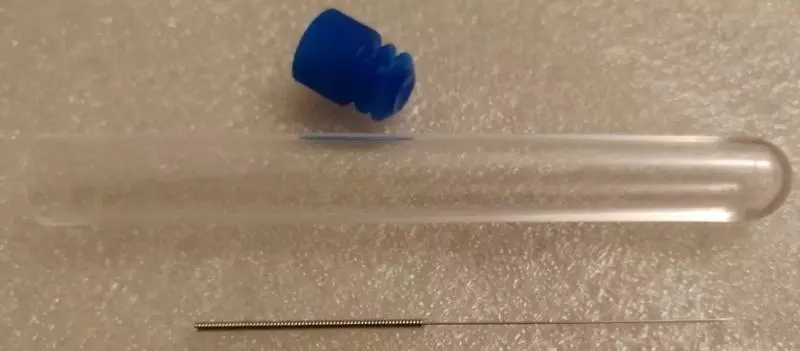
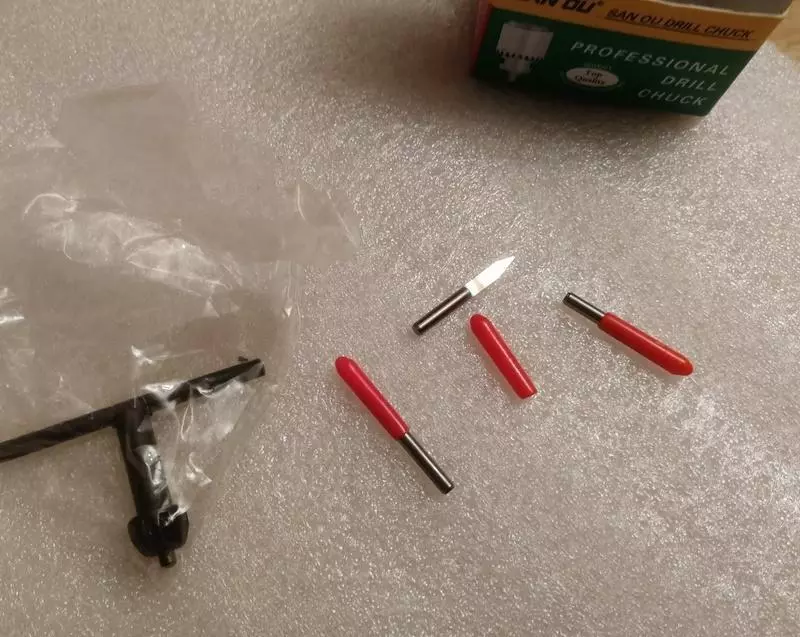
4. 3D Printer Extruder Nozzle Clogged? Acupuncture Needle.
This is a must have tool if you have a 3D printer, it can be bought from many stores but it is a very nice touch from Mooz team to add this in the kit.
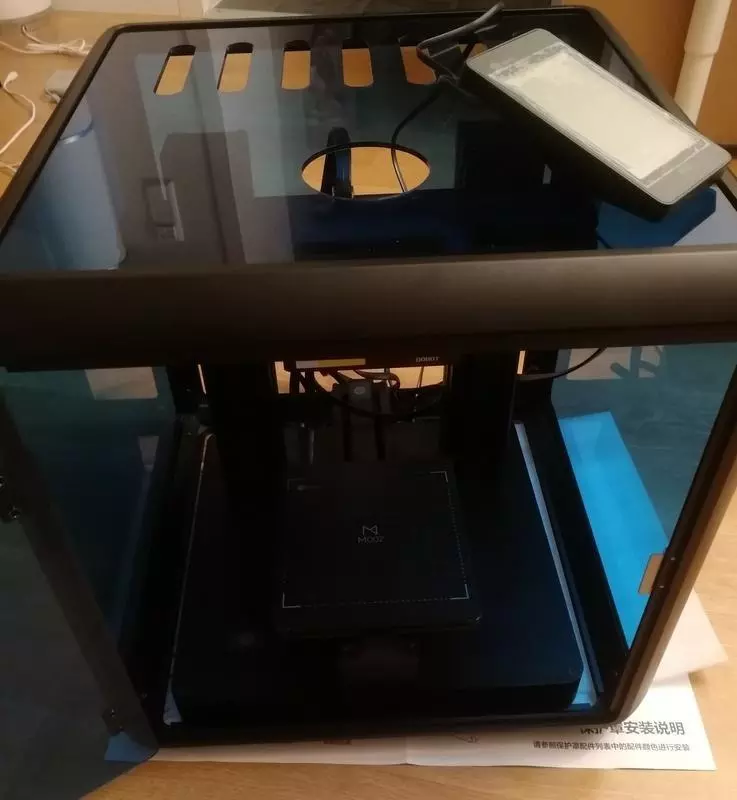
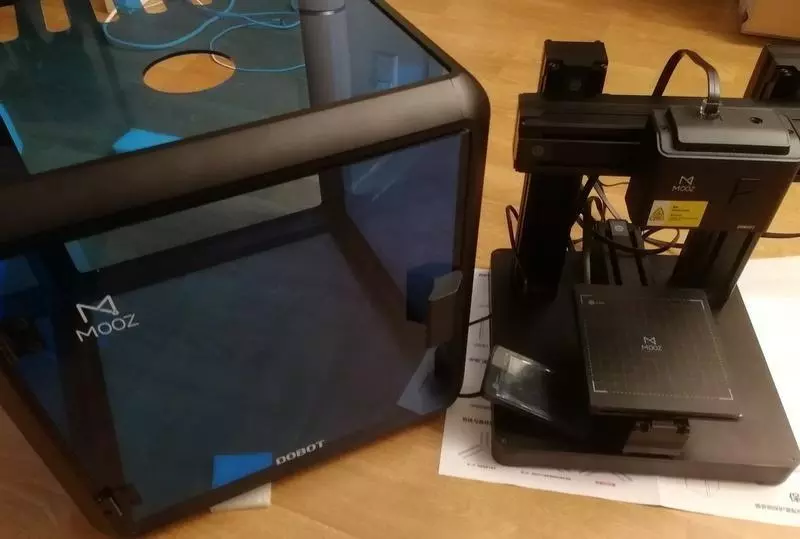
5. 3D printer enclosure - last item on the list but not the least
This is a good have tool if you print ABS. The new enclosure has the looks but it designed a bit short on the back side and you need to take care with the cables.
I will not recommend this enclosure as protection for LASER because the Plexiglas color is blue.
I think i will stick to the old enclosure till i will print new supports for the filament roll that i will fix on the printer back.
(On my Kickstarter printer I have "upgraded" the bed - see here - and i can print Z-ABS, Z-Ultrat and Z-Glass at 260C for nozzle (i use CPU
thermal paste on the heating element) and 130C for bed cutting the heating time to 2-3 minutes because i can use a Heat Gun to heat up the bed.)
6. Other items
Spare parts for printing head and heated bed
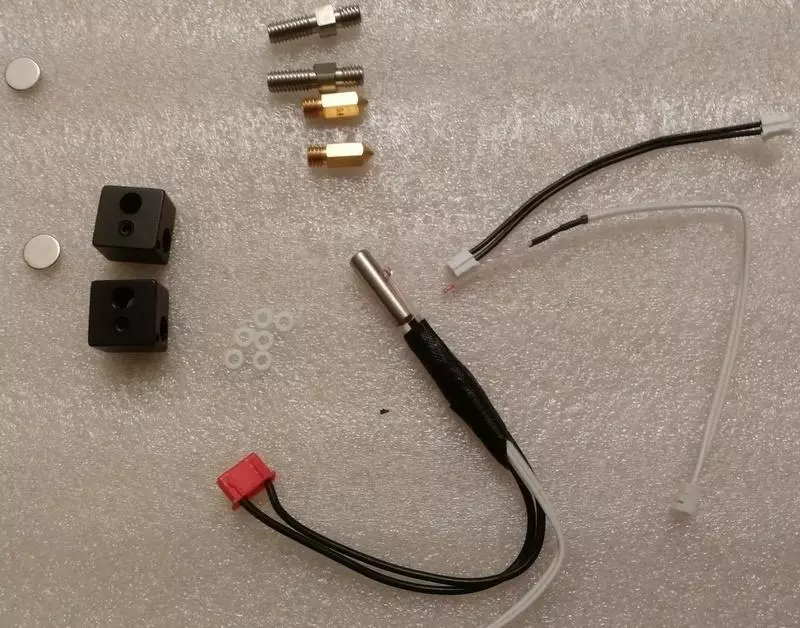
Extra parts included in the kit:
- Roll of PLA filament
- Protection glasses for LASER (green)
- USB cable
- Y axis dust cover
- Set of engraving tools
- 2 covers for heated bed
- Tools for assembly

My Mooz heads collection

The power supply i got in the box seems to be used and damaged, the plug is unusable but supply is identical with the old one so i will use this for testing
till i will order some plugs to fix the new one.


Interface screenshots
The WiFi screen - AP on left hand side and Router on the right hand side

The WiFi screen - password screen

The leveling screen - one "feature" is that you can't choose the step when you've reached a certain Z level, it will
only use the 0.06mm step, i guess this is a foolproof feature.
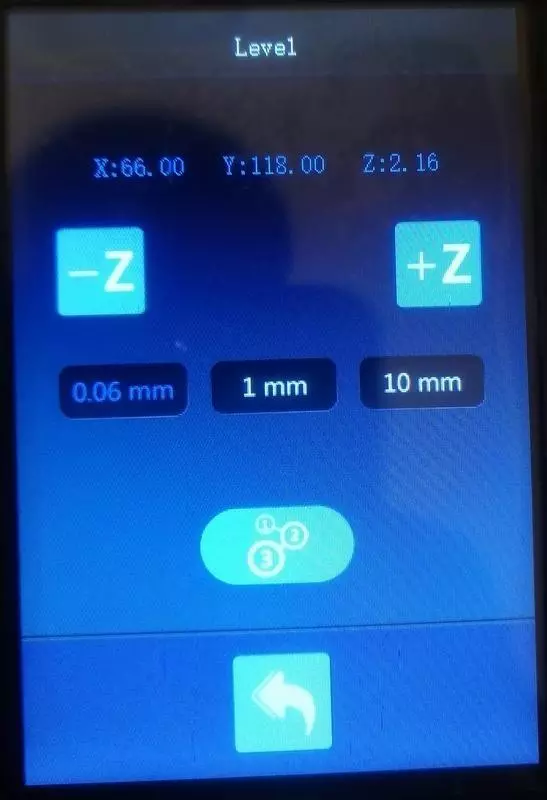
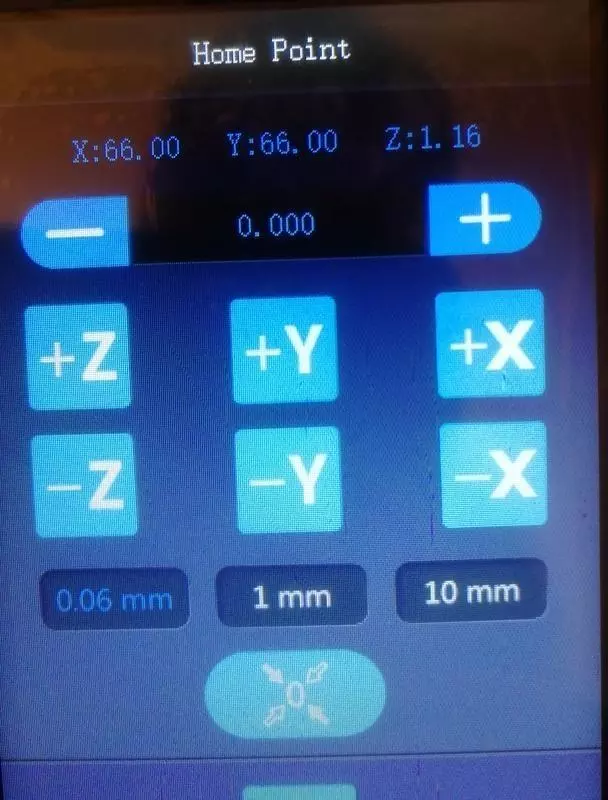
The Z0 screen - Same "feature" as above is present here
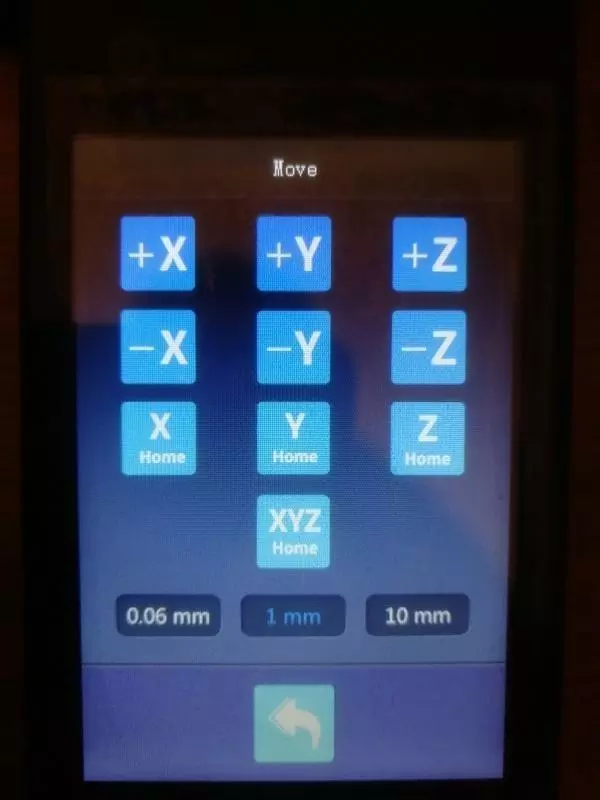
Move/Homing screen
Informations screen - Ah....721hours already? I guess it includes the time spent with DHL

Important : before start using the printer update the firmware. Note that the firmware for printer must be copied on the USB stick and not on the SD card as before.

So far i have only managed to connect to printer using the Mooz App in AP mode
Note that the application is slow on QR scanning and you can't connect directly to the printer AP
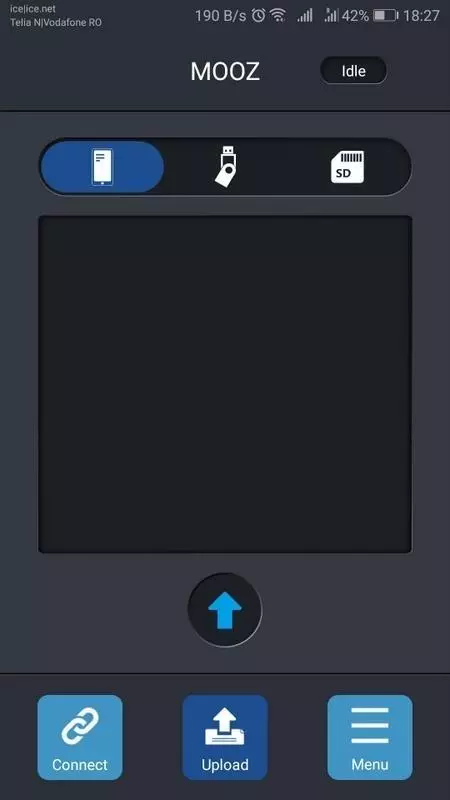
Below are some app screen shots
1. Connection screen - some updates are required

2. App menu

3. App upload
Let's print
As a test part for the first print i have used one of my projects as a start point.
This is a stand for a USB microscope and i need to print a back cover for it.

I use the diagonal of the bed to print bigger parts, this is also a very good method to check the leveling.

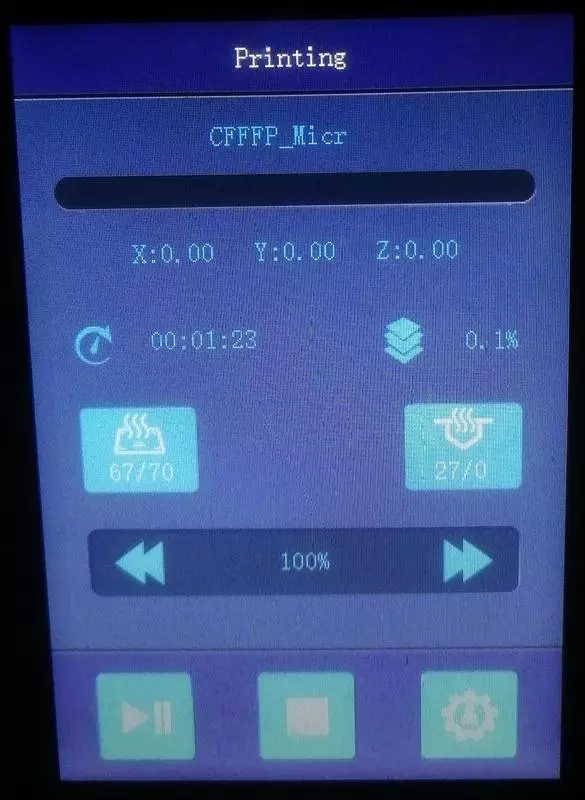
Printing in progress
And this is the result

I have also tested the LASER module and here we have a firmware issue, the LASER power control has some bugs, it is turning the laser on at high power leaving marks on your part, for the moment i will not use the new printer for CNC and LASER engraving.
ToDo: make one more LASER test and add pictures.